Smokes your problems, coughs fresh air.

Tag: XTerm

Copy-pasting to and from XTerms

By default, XTerms only supports the PRIMARY selection for copy and paste. The PRIMARY selection is the one that is used by most ‘modern’ X application when you select text. This text can then usually be pasted by clicking the middle/second mouse button. Because this selection is set whenever you select, it’s easily overwritten, often accidentally. That’s why most newer X apps offer a parallel copy/paste mechanism where the selection is only explicitly set by choosing “Cut” or “Copy” from the application’s “Edit” menu or from its context menu (or with the Control-X/C/V keyboard shortcuts). In X, this selection is called CLIPBOARD, just like in Windows where it’s the only selection.

X also has these selections called Cut Buffers, but these are considered obsolete. Maybe that’s just too bad, because they appear to be the only selections with persistence; the other selections, PRIMARY and CLIPBOARD, disappear when the application is quit. Apparently, this is a feature, because it enables content negotiation.

Anyway, XTerm can be configured to do anything and I want it to be CLIPBOARD aware, for two reasons: one is that I often copy things from applications that can only set the CLIPBOARD selection; another is that I want to be able to really copy something from the XTerm, without losing it as soon as I select something else (especially if that something else is something I want to replace with the selection).

So, I added the following to my VT100.Translations #override in .Xdefaults.XTerm:

XTerm*VT100.Translations: #override \
    ShiftInsert: insert-selection(CLIPBOARD) \n\
    Insert: insert-selection(PRIMARY) \n\
    Shift: insert-selection(CLIPBOARD) \n\
    Shift: select-start() \n\
    Shift: select-extend() \n\
    Shift: select-end(CLIPBOARD)

What this does:

  • This gives me an XTerm that pastes the content of the CLIPBOARD when I hold down Shift during my two-finger tab (I’m using a touchpad, so that works as a Btn2).
  • Because I don’t like moving my hands, I can do the same by pressing Shift+Insert.
  • I can use my Insert key without Shift to paste the PRIMARY selection.
  • To copy something to the clipboard, I hold down the Shift key while making the selection.

That’s how you can make use of the CLIPBOARD from your XTerm.

Sources

If you want to learn more.

XTerm configuration

I just created a gist for my XTerm configuration (separated from the rest of my X resources). Here’s a snapshot of the current version:

XTerm*background: black
XTerm*Foreground: Grey

XTerm*faceName: Liberation Mono
XTerm*faceSize: 10

XTerm*on2Clicks: regex [^  \n]+

XTerm*bellIsUrgent: true

! Make the terminal 127 by 42 characters in size
XTerm*geometry: 127x44+64+0

! By default, XTerm composes special chars with META. With this setting I can work my readline magic instead.
XTerm*metaSendsEscape: true

! Bracketed paste mode requires the allowWindowOps resource to be true 
XTerm*allowWindowOps: true

XTerm*saveLines: 1000

! Don't jump to the bottom when there's output
XTerm*VT100*scrollTtyOutput: false

XTerm*VT100.Translations: #override \
    ShiftInsert: insert-selection(CLIPBOARD) \n\
    Insert: insert-selection(PRIMARY) \n\
    Shift: insert-selection(CLIPBOARD) \n\
    ShiftUp: scroll-back(1) \n\
    ShiftDown: scroll-forw(1)


! vim: set syntax=xdefaults expandtab tabstop=4 shiftwidth=4:

My Window Maker “desktop” configuration

During the ten years of my love-hate relationship with X-Windows, I’ve often tried and enjoyed using full-fledged desktop environment (starting with KDE and later sometimes GNOME too), but, given time, I always gravitate back to WindowMaker.

XTerm

I’m not so big on the whole desktop metaphor thing. The longer I’ve been using Unix-like systems, the more dependent I’ve become on the command-line. My current Window Maker configuration is a testimony to this. If you look at my Main Window Maker Workspace, you’ll notice that I actually use an Xterm instead of a desktop. Also, I don’t have a wallpaper. No wallpaper, no icons: I just want my prompt, in a nice font.

I despise graphical file managers. It feels like having to type without fingers. I’m not advocating the use of a command-line shell for new users or anything but for somebody like me who is used to calling programs “by hand”, a GUI is pure torture. With a GUI, I end up having to find a specialized program for a lot of mundane tasks which can be accomplished in Bash with a simple loop and a few filters. Renaming a few hundred files springs to mind.
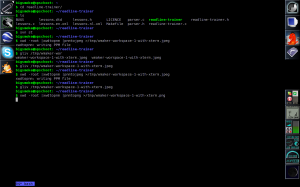
My Main Window Maker Workspace

My Main Window Maker Workspace

GNU Screen provides for “tabs” in my XTerms and some other features I’ve come to depend on. That’s why, upon login, my Main Workspace appears with xterm -e screen already started. The Windows Key + T fires up another XTerm with a fresh screen session. If I want to attach to a previous Screen session, I use Window+Shift+T. This starts an XTerm without Screen.

Starting applications

I don’t like the applications menu, but I’ve added a few applications to it anyway to be able to bind short keys to them (Win+F for Firefox and Win+T for XTerm). When I want to start any other application, I use the run dialog (bound to Win+R) or I execute the app from an XTerm window. I don’t usually start applications by clicking their App Icon.

File viewers (such as Mplayer, Gliv, Okular, xlview, and wordview) are always started from an XTerm or from Firefox, because that’s where all my file arguments originate. These apps don’t need App Icons, especially because I don’t see them as belonging to any particular workspace.

All keyboard shortcuts

Instead of Alt, I use the Window key (Mod4) a lot for my keyboard shortcuts.

cat /home/bigsmoke/GNUstep/Defaults/WindowMaker |grep -i key|sed -e 's/^\s*//'|sort
CloseKey = "Mod4+Q";
FocusNextKey = "Mod4+Tab";
FocusPrevKey = "Shift+Mod4+Tab";
HideKey = "Mod4+H";
HideOthersKey = "Shift+Mod4+H";
HMaximizeKey = None;
LowerKey = "Mod4+Down";
MaximizeKey = "Mod4+M";
MiniaturizeKey = "Mod4+period";
ModifierKey = Mod4;
MoveResizeKey = None;
NextWorkspaceKey = "Shift+Mod4+Right";
PrevWorkspaceKey = "Shift+Mod4+Left";
RaiseKey = "Mod4+Up";
RootMenuKey = "Mod4+A";
ScreenSwitchKey = None;
ShadeKey = "Mod4+minus";
ToggleKbdModeKey = None;
WindowListKey = "Mod4+W";
WindowMenuKey = "Mod4+Escape";
WindowShortcut10Key = None;
WindowShortcut1Key = "Mod4+1";
WindowShortcut2Key = "Mod4+2";
WindowShortcut3Key = "Mod4+3";
WindowShortcut4Key = "Mod4+4";
WindowShortcut5Key = "Mod4+5";
WindowShortcut6Key = "Mod4+6";
WindowShortcut7Key = None;
WindowShortcut8Key = None;
WindowShortcut9Key = None;
Workspace10Key = None;
Workspace1Key = "Mod4+F1";
Workspace2Key = "Mod4+F2";
Workspace3Key = "Mod4+F3";
Workspace4Key = "Mod4+F4";
Workspace5Key = "Mod4+F5";
Workspace6Key = "Mod4+F6";
Workspace7Key = "Mod4+F7";
Workspace8Key = "Mod4+F8";
Workspace9Key = None; 

One annoyance is that, when switching through the Windows in the current Workspace (in my case, with Win+Tab and Win+Shift+Tab), doesn’t disappear unless an additional key press is given (such as an extra Tab).

Another annoyance is in my configuration. My keyboard has some space after every 4 function keys. Also, like always, the function keys are a bit far removed from the home row on the keyboard. So, I should consider switching through workspaces with Win+1 through Win+7 instead of Win+F1 through Win+F7. I’ve now bound the Win+<number> keys to a Window 1 to 10, but this seems to be terribly broken anyway in Window Maker (I can only switch to the first window in the first workspace this way). Also, I probably wouldn’t use it even if it did work, unless if they displayed the window numbers on the app icons or something and if they did the numbering on a workspace basis instead of globally. So, I’m probably going to change this soon.
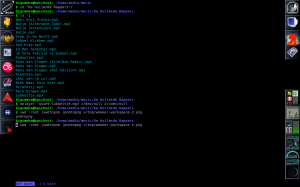
My Window Maker Workspace for Audio

My Window Maker Workspace for Audio

Workspaces

One of the things I’ve always like about X Window Managers is the support for multiple virtual desktops, called Workspaces in Window Maker. I use topical workspaces, one workspace per application category. It’s possible to configure app icons to always start the application in the correct workspace regardless of where it is started from. My Workspaces are called Main, Audio, Video, Down, w3dev and Image.

If I want to look at my downloads, I know that I just have to switch to Workspace 4 (Down) regardless of what I’m downloading. The same goes when I want to switch a song (be it in Mplayer (in an XTerm) or in the Last.fm Player): I press Win+F2.

Here’s a list of all the app icons divided over my different workspaces:

  1. Main: Window Maker Preferences, Google Earth, Skype, Filelight
  2. Audio: Rosegarden, Audacity, Hydrogen, Last.fm, Grip, Ardour, ReZound, Gnaural
  3. Video: Cinelerra
  4. Down: BitTorrent, uTorrent, Transmission
  5. w3dev: MSIE, Konqueror
  6. Image: Krita, Inkscape, GIMP, Color Schemer Studio

I have a widescreen laptop, so I display all these per-workspace icons (with the Clip) vertically at the top left. At the bottom left I display the “Icon List”. This is used by WindowMaker for icons that are not already in the Clip or in the Dock.

At the right I display the dock with the XTerm icon and the Firefox icon. There’s also an Emacs icon there from the time that I wanted to learn Emacs. (Sadly, I know VIM too well to change.)

Below that, also at the right, are the Dock Apps: wmsystray, WMWiFi, wmmixer, WMitime, wmbattery, and of course wmMoonClock.

Why Window Maker

With all this reluctance to click on icons, you’d wonder if I wouldn’t be better of trying something more keyboard centric such as StumpWM (the successor of Ratpoison).

If I will, I’ll let you know.

GNU Screen window captions as XTerm tabs

XTerm is my favorite terminal emulator and I love GNU Screen. So, imagine my joy when I found out that Screen can persistently show window captions ([Ctrl+A]: caption always).

GNU Sreen with default window captions (in XTerm)

Now I wouldn’t loose track of my windows so easily. No more detours through the Window-list, and it gets better; from the Screen manual, I learned that I could set the caption to a string. Look what [Ctrl+A]: caption '%w' does:

GNU Screen with simple window captions (in XTerm)

Cool! I could finally have my XTerm tabs. 🙂 Just recently, I was telling Wiebe—in reply to a complaint of him about getting lost in Screen’s window list—how cool it would be if you could have a terminal emulator display a tab for each screen window. Now I can tell him, instead, that tabs in a terminal emulator are a superfluous feature.

My current configuration

GNU Screen with window captions (in XTerm)

This last example is done with the following Screen command: caption always "%{= kB}%-Lw%{=s kB}%50>%n%f* %t %{-}%+Lw%<" There are more examples in the manual page. Enjoy your tabs!

XTerm is favorite

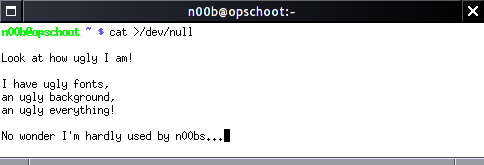
XTerm is know to most X-Windows users as that ugly terminal with the strange scrollbar and the unreadable font. And it doesn’t even have tabs! But, I think it’s the best damn terminal emulator in the world. It just doesn’t appear that way at first.

By default, XTerm comes with warts:

  • It has an ugly, small font.
  • What’s up with the black on white? I’m a 1337 h4x0r and I want a black background, damnit!
  • Double-click Selections is unintuitive.
  • Where are the tabs?

Default configuration for XTerm 234

But its warts are easily removed.

The font is small and ugly

Easily solved:

$ xrdb -merge
/* I want pretier fonts */
XTerm*faceName: Liberation Mono
XTerm*faceSize: 10
[Ctrl+D]
$ xterm

XTerm with nicer than default font

The black on white is an insult to my 1337ness

No longer so:

$ xrdb -merge
/* I want a 1337-style color-scheme */
XTerm*background: black
XTerm*Foreground: Grey
[Ctrl+D]
$ xterm

Now I can install my 1337 hacking tools in style! (If only I could install 1337 hacking skills as easily.)

1337-style XTerm

Double-click selections are unintuitive

Most terminal emulators let you double-click to quickly select words. XTerm does this as well, but its definition of a “word” is a bit narrow if you’re used to other programs. The good news is that XTerm is extremely configurable in this sense. It lets you decide what to select on double-click, on triple-click, all the way up to 5 clicks. You can define the boundaries of the selection by means of presets such as line, group and page, but what I like best is its ability to use regular expressions. This lets you do cool things, like, for example, using one click to select a word, two clicks to select a sentence, and three clicks to select a paragraph.

My own configuration is a bit simple, probably a testimony to how little code I write these days:

$ xrdb -merge
/* The selection only stops at spaces and newlines */
XTerm*on2Clicks: regex [^  \n]+
[Ctrl+D]

Where are my tabs

You should really be using GNU Screen instead, which has too many advantages to name here. It even allows you to do Remote pair programming over SSH.

If you use Screen within an XTerm, be sure to add to following to your X configuration.

$ echo "XTerm*metaSendsEscape: true" | xrdb -merge

Otherwise, you might find yourself unable to control Screen

Saving your configuration

Ready to save your precious configuration?

$ xrdb -edit .Xdefaults

You’re done. It’s time to go brag to your friends.

Remote pair programming with GNU Screen

I like pair programming. So much, in fact, that I want to do it even if I can’t look over the other person’s shoulder due to some geographical offset. Since I’m a real command-line freak, I can get what I want easily by using GNU Screen.

GNU Screen rehash

If you don’t know GNU screen yet and you ever find yourself using the command-line for an extended period of time, learn it. Now. I’ll name just a few advantages:

  1. You can manage multiple “windows” conveniently even if you don’t have a tabbed terminal emulator, or even when you’re not within a graphic environment such as X.
  2. You can “detach” and “reattach” your Screen sessions and continue exactly where you left. This is very useful if you do your work on a remote server, through SSH, for example. Never by stumped by instable connections again!
  3. But, the feature which is most useful for pair programming is the ability to attach to the same session from multiple terminals.

Starting GNU Screen is very easy. Just type screen at your shell prompt (or screen -S SESSION_NAME if you want your session to have an easy-to-remember name).

Press CTRL+A followed by d to detach. Exit your terminal. Start a new terminal, type screen -r and be amazed that you have your session back. screen -r can take as an argument the name or PID of the screen, which is useful if you have more than one screen running. To get a list of current screen sessions, type screen -ls.

Inviting your observer

The first thing you have to do is to add the following command to your .screenrc file:

multiuser on

If you don’t want to enable multiuser by default, you can also choose to type the command from within Screen each time that you need it. This is done by pressing Ctrl+A, followed by : and the command.

Myself, I prefer to have the command in my .screenrc. You need to admit users explicitly anyway. Admitting full access to a user is done by typing the :acladd USERNAME command (after pressing Ctrl+A). Then the given user can join this session by starting screen with screen -x SESSION_OWNER/ where SESSION_OWNER is the driver.

Get out of my driver’s seat! (Dealing with annoying observers)

The :acladd USERNAME command will give the observer full read-write access. Maybe, if you have to deal with an observer who insists on taking the driver seat, you want to limit his or her access to read-only. This can be done just as easily: press Ctrl+A; then type :aclchg USERNAME -w "#".

Make your terminals match

Using a shared screen, it can be kind of annoying if your terminal sizes don’t match. As an observer, I fix this by asking the driver to tell me the values of the $ROWS and $COLS environment variables. If then, for example $COLS=110 and $ROWS=40, I start my xterm with this in mind: xterm -geometry 110x40

Have fun with Screen!

I’ve only touched upon some of the things you can do with screen. The manual page contains much more information—perhaps a bit too much even. 😕

One of the things I also like to do with a shared screen session is remote system administration. If I want to perform delicate tasks as root, I find it kind of comforting if someone can stop me in time, before I do anything stupid. Besides, if you’re both root, you don’t even have to set permissions. 🙂 So, it’s easy to.

© 2024 BigSmoke

Theme by Anders NorenUp ↑