This site provided a nice short c program to measure seek times. I would attach the file in case that site goes down, but this blog still has upload errors…
Category: Technology (Page 21 of 48)
This post is even more of a memory aid than normal; it’s really only useful to me.
Source. I assume Ubuntu is similar.
To create an iSCSI target, first install the software:
aptitude install iscsitarget iscsitarget-modules-2.6-amd64
Edit /etc/default/iscsitarget and put in:
ISCSITARGET_ENABLE=true
Edit /etc/ietd.conf and put in something like this (do man ietd.conf for explanation of the parameters):
Target iqn.2010-12.com.example.host:storage.lun1
  # no user based auth (user and pass empty)
  IncomingUser
  # no user based auth (user and pass empty)
  OutgoingUser
  # Path can be any file or block device, also /dev/sdb
  Lun 0 Path=/dev/sdb1,Type=blockio
  Alias LUN1
/etc/initiators.allow and /etc/initiators.deny should both be empty, and therefore allow all. Use iptables to restrict access to hosts.
Then can start /etc/init.d/iscsitarget start
As for the initiator:
aptitude install open-iscsi
Edit /etc/iscsi/iscsid.conf and change the line:
node.startup = automatic
Then tell it to look for volume groups after starting (because when booting, lvm is started before iscsi). Edit /etc/default/open-iscsi:
LVMGROUPS="vgname"
Then start the deamon (wasn’t it active already…?):
/etc/init.d/open-iscsi restart
Then discover and build the node database (in /etc/iscsi/nodes) for your target (when you do that again, it overwrites, so I don’t know what you should do when you’ve added a target on the server):
iscsiadm -m discovery -t st -p ipaddress
Then login:
# You can logout again by using this line and replacing login with logout.
iscsiadm -m node --targetname "iqn.2010-12.com.example.host:storage.lun1" --portal "192.168.0.102" --login
Disk is now available under a device node like /dev/sdb. I don’t know how I could fix this to a specific device, to prevent changes when you change the hard disk configuration. Perhaps I can configure a udev rule for the lun in question.
A year ago, my web host thoroughly explained how PHP include vulnerabilities can be exploited, hoping that better user education would leave less member-sites vulnerable to automated attacks by spammer scum.
From its inceptions, this blog has run on NearlyFreeSpeech.Net’s FreeBSD web hosting service. Because of very clever resource sharing (when not serving visitors, a site hardly takes up resources), their pricing has always been very competitive. That, combined with their technical flexibility, support and transparency has made me more of a fan with every year that I’ve used their service. Still, sometimes I’ve been wanting to use something else than CGI (they support many, many programming languages for CGI – even C/C++) or mod_php, like Rails or Django or mod_perl.
Since April, they offer this possibility, with Pools.
Tom Moertal’s has a simple stance on the complexities of web-font licensing:
When there are more than enough high-quality open-source fonts to meet almost every practical need, why suffer licensing hassles and the risks of non-compliance? Just pick an open font and get back to life.
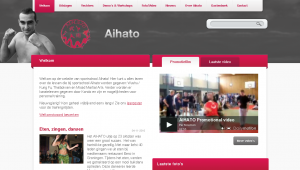
On Oktober, the 25th, in what will be known to future generations as a historical move, Wiebe changed the A record of www.aihato.nl to point to the new production site running at Ytec. The new site, a collaboration by Ytec and me, based on WordPress, has been in development since May. At least, that’s when I started taking notes. There had been some discussion, wire-framing and design done before that time.
The graphical design for the new Aihato website was created in Photoshop by a Ytec employee, building on a wire-frame created by Ying Hao (good friend and owner of Ytec). Another Ytec employee freed me of the burden of slicing the design into HTML/CSS, so that I could concentrate on the WordPress programming work involved. I liked not having to worry too much about design for once.
Initial development setup
Because I had decided to put WordPress in its own subdirectory to keep my custom stuff separate from the factory default stuff, I needed my own vhost at Ytec, something I had gotten used to with all my previous web development projects. Initially, I tried to make things work in my own ~subdirectory on a shared vhost, but this wreaked havoc with the rewrite voodoo that I needed to make WordPress live comfortably in its own subdir. Maybe, it would have been better to use vendor branches; but decisions, decisions…
A Makefile for deployment, sychronisation and backups
On many of my recent projects, I’ve used Rake instead of GNU Make. This time, I took it oldschool to pimp up my Make skills a bit. This proved pretty necessary, because I’ve spent ages on a bug in a previous version of the Makefile were I defined a variable after a make target without realizing that I had to put this in a separate rule from the instructions to make that target.
Why I even need a Makefile? Because when you’ve had your fair share of deployment, synchronisation and backup problems, you like to define rules to avoid these problems. Makefiles are ideal for that purpose, because they consist of rules.
I’m publishing the Makefile here because it’s one of the prettier Makefiles I’ve made and I like to brag and remember myself of some of the new things that I learned during its creation.
RSYNC_OPTIONS := --verbose --progress --recursive --delete --links --times --filter='merge ./rsync-upload-filters'
WORKING_COPY_ROOT := ${HOME}/www.aihato.nl/
LIVE_PRODUCTION_ROOT := ytec.nl:/too/much/info/aihato.nl/
LIVE_DEVELOPMENT_ROOT := ytec.nl:/too/much/info/aihato-dev/
MYSQL_LOGIN := --user=aihato --password=InYourDreamsIdForgetToChangeThis


deploy-production:
    # First, I sync everything except the symlink to the current WP version
    rsync $(RSYNC_OPTIONS) --filter="exclude /wp"  $(WORKING_COPY_ROOT) $(LIVE_PRODUCTION_ROOT)
    # Now, if the symlink's target has changed, we've atomically upgraded all WP files
    rsync $(RSYNC_OPTIONS) $(WORKING_COPY_ROOT) $(LIVE_PRODUCTION_ROOT)

backup-production:
    rsync ${RSYNC_OPTIONS} $(LIVE_PRODUCTION_ROOT)uploads/ $(HOME)/aihato-uploads/
    ssh ytec.nl "mysqldump $(MYSQL_LOGIN) aihato" > aihato.sql

update-development:
    rsync $(RSYNC_OPTIONS) $(WORKING_COPY_ROOT) $(LIVE_DEVELOPMENT_ROOT)
    rsync $(RSYNC_OPTIONS) $(LIVE_PRODUCTION_ROOT)uploads/ $(LIVE_DEVELOPMENT_ROOT)uploads/
    ssh ytec.nl "mysqldump $(MYSQL_LOGIN) aihato | mysql $(MYSQL_LOGIN) dev_aihato"

backup-development: mysql-dump-development
    rsync ${RSYNC_OPTIONS} $(LIVE_DEVELOPMENT_ROOT)uploads/ $(HOME)/aihato-uploads/

mysql-dump-development:
    ssh ytec.nl "mysqldump $(MYSQL_LOGIN) dev_aihato" > dev_aihato.sql

.PHONY: update-development backup-production deploy-production mysql-dump-development
Front page
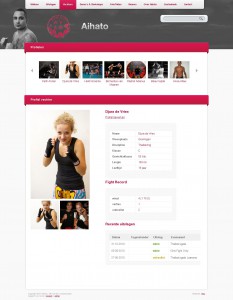
The front page, after the header with the navigation and logo, starts with of a little snippet of text to welcome visitors. The rest of the page is filled with some selected stuff from the rest of the website: the latest news excerpts (plus a link to the full archive and the news feed and the Aihato hyve), clickable sponsor logos, some upcoming agenda items, a promotional movie clip, the latest video from the video gallery, a carousel with the latest photos, another carousel with all the fighter profiles and the latest fight results.
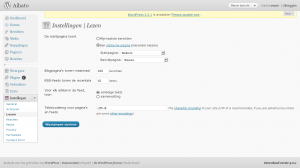
In WordPress, when you want the home page to be a static page, you have to change a setting in the Settings / Reading subpanel. You will then have to choose another page to be the “posts” page. The other page will than use the template hierarchy the same way the home page would without this setting. The only custom page template you can use for it is home.php, which might cause confusion with the actual home page.
Template entanglement
The start page is one of a number of pages for www.aihato.nl that needed a custom template. To associate a custom template with the start page, I had two choices: I could either name the template file page-3.php, according to the Template Hierarchy, or I could create a Page Template. The difference between the two options is that with the latter option, the association with the custom template happens from the Edit Page screen, whereas the first option relies on the naming of a template file in my theme. I chose the first option, which is a bit ugly, because after setting a page as start page, editing the page slug is no longer possible. (Normally you can name the template file page-<slug>.php, which is clearer and doesn’t depend on database state.) Both solutions are ugly in a sense because there’s just too much stuff in the database to my taste, but that’s another story which I’ll probably tell in reference to Drupal one day, since Drupal is way uglier than WordPress in this sense.
I’ve ended up with a bit of a random mix of page-targeted templates and templates targeted from pages. The highlight is a template which does both: page-sportschool.php targets the page with the “sportschool” slug, but also has the following comment so that I can select it from the Page Edit screen for the subpages of “sportschool”:
<?php
/*
Template Name: Sportschool
 */
?>
Events
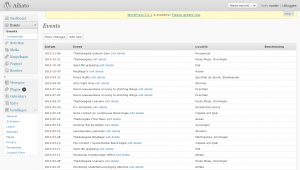
It was decided that the new website, like the old website, would have an agenda. The old website’s agenda was never up-to-date, so the new agenda should be easier to edit. To that end, I created an aihato-events plugin.
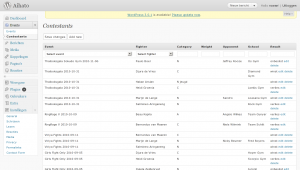
The plugin is quite simple. It adds two tables to the database – one to record (and announce) events and another to store fight results for these events (wins, losses, etc.). The second table links to a fighter profile by post ID (but more about that later).
The event management interface is pretty decent. It includes a few darlings, which I wouldn’t like to kill, except that I will probably overhaul the whole Aihato Events UI at some unspecified time in the future. The darlings are small touches such as the “Add new” buttons above and below the table which add a new row through AJAX at the top or the bottom of the table depending on which button is clicked. I’m also always a sucker for the in-place AJAX editing of the rows. The reason why I’ll probably still overhaul the UI at some future time is that I don’t like the same simple tabular interface for the Contestants panel. I had predicted that fight events would generally first be placed in the agenda before the event takes place, untill after the event, the results would be added. So far, nothing has been placed in the agenda before it takes place. Only after, to be able to link it to the results to be added. And even if this wasn’t true, the two screens should still become one I think.
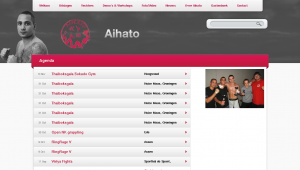
The homepage contains the first few upcoming events. Sadly, there aren’t any yet. 😕 Below that short (and empty) list, there’s a big button which links to the complete agenda. This page has a design that somewhat deviates from the rest. Of course, it also has some custom template programming (in a template called page-agenda.php).
Event results
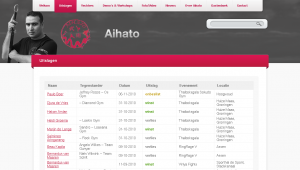
The homepage also contains all the fight results for the latest event in a nice little table at the bottom right. Consistent with all the other areas on the homepage, this one is also followed by a link to the results for all recorded events in the form of a nice big button. The page with the complete results is powered by page-uitslagen.php.
This is one of the templates which I should really clean up by moving some code into nice and clean helper functions that live in the theme’s functions.php instead of all over the place.
I18n
My interest in internationalization for this website extends only as far as that I want the visitor to be talked to in Dutch as much as possible. For the rest, I don’t really care. How much I don’t care can be summed up by the total absence of __()-encapsulated strings in my theme. What’s worse: my custom plugins also lack these l10n hooks, although, because I always feel like a sinner when working directly in what is considered a translation target by me and the rest of the English-oriented development world, the event management stuff that I added to the management interface is in English (although, again, without l10n hooks, so what’s the point?).
Fighter profiles
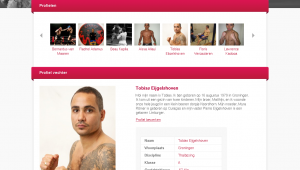
Fighter profiles play a dominant role in the new design. Implementation took some time, and I’m still not entirely satisfied. During development, custom post types were introduced in WordPress. I had already implemented the fighter profiles using a page template and a whole heap of custom fields. Adding new profiles this way, however, is far from user-friendly. The user has to:
- Set the page parent to “Vechters” (Dutch for “Fighters”);
- set the page template to “Vechter”;
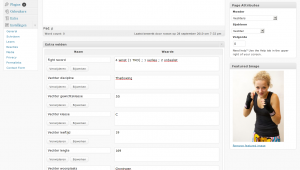
- add new custom fields for Discipline, Fight record, Weight, Class, Age, Length and City while making sure that the values are entered correctly since these don’t have a type;
- and set a featured image for display in the fighter carousel on the front page and above the profiles.
This is a lot of work, none of which is very obvious, so I hoped that custom post types would save the day. Theoretically they could have, but there were a few issues, some of which I only encountered when I was already quite far into the development of an aihato-profiles plugin which implemented the aihato_fighter custom post type.
I started out by fooling with some plugins to do some of the heavy lifting (such as Custom Post Type UI). I wasn’t particularly charmed by these for reasons which I’ve sadly forgotten because I haven’t commented on it at the time. One reason I can think of is that I never like defining stuff in the database which I feel belongs in a file.
There seemed to be a bug in the custom post type admin interface created by WordPress in that, even though I had enabled thumbnail support for my post type, the UI for this was lacking. Another bug related to images was that clicking the Insert image button replaced the current page with the upload dialog instead of loading it in a modal dialog through AJAX. These two bugs were show-stoppers. I won’t comment any further on the whole custom post type development process until I actually continue this process.
Anyway, it all works now and I don’t mind doing some work on new fighter profiles myself. Editing existing ones is easy enough, and at the visitor end, it all looks sexy enough. 😎
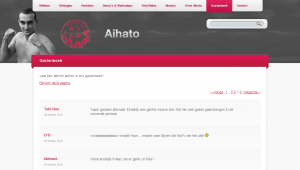
Guest-book
Implementing the guest book was pretty easy. What was less easy was importing all the entries from the old guest-book. Although, even that was incredibly easy compared with extracting (exporting is too expensive a verb) the entries from the old guest-book. The old guest-book was basically impossible to spider, because the pagination depended on POST. If it were only the page number in the POST request, it wouldn’t have been too bad (and quite hackable for my purpose), but there was all sorts of session-related crap and other ugly stuff that smelled like a bunch of Microsoft Monkeys had gone all out in a HTTP obfuscation contest.
My initial import strategy consisted of a simple PHP script (with a function adapted from some plugin) to be ran from the command-line, that accepted the author and date as arguments and the post body over STDIN.
<?php

require_once('wp-config.php');

function guestbook_new_comment ( $commentdata ) {
  $commentdata['comment_post_ID'] = 19 # This is the Aihato guestbook page
  $commentdata['user_ID']         = 0 # These people don't have accounts

  $commentdata['comment_author_IP'] = '127.0.0.1' $_SERVER['REMOTE_ADDR'];
  $commentdata['comment_agent']     = 'Hacked together import scripts (by BigSmoke)';

  // We want to use the original comment date, not the time now.
  //$commentdata['comment_date']     = current_time('mysql');
  //$commentdata['comment_date_gmt'] = current_time('mysql', 1);

  // Automatically approve these comments.
  $commentdata['comment_approved'] = 1;

  // Actually add to the database
  $comment_ID = wp_insert_comment($commentdata);

  do_action('comment_post', $comment_ID, $commentdata['comment_approved']);

  return $comment_ID;
}

$commentdata['comment_author'] = $ARGV[1];
$commentdata['comment_date'] = $commentdata['comment_date_gmt'] = $ARGV[2];
$commentdata['comment_content'] = trim(readfile(STDIN));

$new_comment_id = guestbook_new_comment($commentdata);
echo "Inserted new comment $new_comment_id to post 19.\n";

?>
The script would be called from a Ruby script that parsed the ugly-ass HTML-like tag soup also known as the old guest-book. I have to admit that the script is as ugly as the shit it’s supposed to make sense of. Fuck it! One-of scripts don’t need to look good; it’s already been deleted from svn 75 revisions ago.
However, I never could call the PHP script from the Ruby script because I couldn’t get the necessary gems to install on the development server where the import needed to happen, so I ran the script locally and modified it to use WordPress’ XML-RPC interface. To make this work, I only had to install a WordPress plugin to allow anonymous comments through XML-RPC. (See my previous notes on this subject, if you’re interested.)
[By the way, I just copied this script to the clipboard using “svn cat https://svn.ytec.nl/svn/aihato/trunk/import-guestbook.rb@37|xsel --clipboard”; see my post on xsel if you want to learn more.]
#!/usr/bin/ruby

require 'scrapi'
require 'open3'
require 'xmlrpc/client'


guestbook_entry = Scraper.define do
  process "td > div.GB_Head > div.GB_Date", :date => :text
  process "td > div.GB_Head > div.GB_Name", :name => :text
  process "td > div.GB_Body > div.GB_BodyText", :body => :element

  result :date, :name, :body
end

guestbook = Scraper.define do
  array :entries

  process "table.GB_MainGrid tr", :entries => guestbook_entry

  result :entries
end

# I need to do this because the document has at least 3 <html> tags,
# so it's impossible to parse, even for Tidy
fake_document = "<html><body>"
reading_guestbook_table = false
STDIN.readlines.each do |line|
  if line =~ /<table class="GB_MainGrid"/
    reading_guestbook_table = true
  end

  if reading_guestbook_table
    fake_document += line
    reading_guestbook_table = false if line =~ %r{</table>}
  end
end
fake_document += "</body></html>"

entries = guestbook.scrape(fake_document)

entries.delete_at(0)

entries.each do |entry|
  next unless entry['body']

  date_parts_in_proper_order = entry['date'].split(/-/).reverse
  date_string_with_proper_zeroes = "%d%02d%02dT00:00:00" % date_parts_in_proper_order
  entry['date'] = XMLRPC::Convert.dateTime( date_string_with_proper_zeroes )

  server = XMLRPC::Client.new("aihato.dev.ytec.nl", "/wp/xmlrpc.php")

  entry['body'] = entry['body'].to_s
  entry['body'].gsub!(%r{<div class='GB_BodyText'>(.*)</div>}m, '\1')
  entry['body'].gsub!(%r{</p>\s*<p>}, "\n\n")
  entry['body'].gsub!(%r{</?p>}, "")
  entry['body'].chomp!

  new_comment_id = server.call('wp.newComment', 1, '', '', 19, {'comment_parent' => 0, 'content' => entry['body'].to_s, 'author' => entry['name'], 'author_url' => '', 'author_email' => 'dummy@example.com'} )

  puts new_comment_id.inspect

  # Change date and approval status
  server.call('wp.editComment', 1, 'myuser', 'nottherealpassword', new_comment_id, {'status' => 'approve', 'date_created_gmt' => entry['date'], 'author' => entry['name'], 'author_email' => 'dummy@example.com'})

  #Open3.popen3("php -q import-guestbook.php '#{entry['name']}' #{entry['date']}") do |stdin, stdout, stderr|
  #  stdin << entry['body']
  #end
end
Because I was too stupid to write a spider function to download the old guest-book, I ended up simply clicking through all the pages and feeding the page source to my import script one page at the time.
The new guest book is the only page on the website with comments enabled. For the rest it’s like any other page with its own custom template (page-gastenboek.php).
Contact form
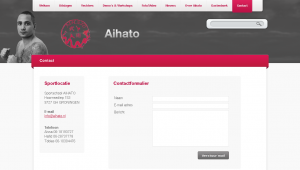
In my notes made during the development process, I have made a few comments (1, 2, 3, 4) about the troubles I had when looking for a simple plugin to create a simple contact form. I would have saved quite some time if I had skipped the search and wrote my own code to handle it. In the end I did use a plug-in. Well, I forked it, but that’s just another way of using it, isn’t it?
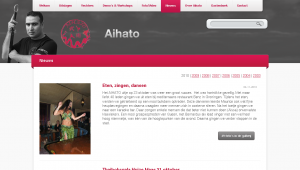
News
The actual news section (where I could use WordPress’ core strength – its blogging engine) is maybe the foremost reason why I let myself be suckered into another web project despite my many vows to never program for money again. (Well, this being a club project, means that I could somewhat sidestep my many promises to myself, because there was hardly money involved in the process. (I train for free for a year.))
The old website’s news page was just a very long list of all the news since 2003. This was pretty suck-ass. What was much worse, though, was that there was no RSS feed. This new website being WordPress based means that I have a whole slew of feeds to chose from. It gave me quite a kick when the first news item posted by someone else hit my feed reader. Now, there are no longer any sites left that I have to manually check for updates. Yay!
An interesting choice I made for the news archive is that I skipped pagination altogether and instead presented a list of years all the way back to 2003 where you’d normally expect to see pagination. Personally, I don’t mind long pages. In fact, I often find clicking “Next” and “Previous” infinitely much more annoying.
Commenting on the news isn’t allowed by request of the Aihato boys. They gave some pretty good reasons not to do this mostly related to the intentional abuse by club members and members of competing clubs that they’ve seen on the website of a friendly club.
The news section is just one of the many places where I’ve made thankful use of WordPress’ new Post Thumbnails feature. I like it when stuff that’s only available through clumsy hacks and plugins makes it into core. By the way: when working with post thumbnails, the regenerate-thumbnails plugin proved to be an enormous aid.
Media gallery
Even on the old website, the foto gallery played an important role. Thinking of the best way how to do this in WordPress was quite a headache.
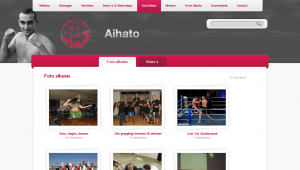
To start with, the design requirements were pretty steep. Ying had included a coverflow-like effect in his wire-frame for viewing individual albums. Luckily, the list of photo albums wasn’t too difficult (a simple grid-view) and made easier still by the HTML/CSS guy. I also skipped a few requirements such as highest rated photos and videos. (I skipped the rating feature altogether.) Still, I spent a lot of time looking through available plug-ins and into different ways to solve the most challenging requirement: there had to be a separate section for the photo albums and the videos, where intuitively I’d simply include it all in the news as is customary with a blog. In the end, I did exactly this but with a twist.
The process of publishing a new photo album has become extremely straight-forward: the user has to upload the images using the Add image link, insert the gallery in the post (if they want a clear link from the news item view to the gallery) and check the “Fotogalerij” (Dutch for “photo gallery”) category (if they want the album to appear in the list of albums).
Since I’ve chosen not to make photo albums a separate entity in the back-end, I had to work a little magic to make them appear as such to the visitor. But I didn’t want to make the separation go too far; I don’t like websites (such as the old Aihato website) where the photo gallery seems bolted on as an afterthought and the user has to upload an album and then create a link to the album in the news.
The gallery view
You know how WordPress makes a comments feed available for every post? It accomplishes this using something it calls a rewrite endpoint (“feed” for feeds). For example:
http://www.example.com/blog/2010/11/08/post-with-interesting-comments/feed/atom/
http://www.example.com/blog/2010/11/08/post-with-interesting-comments/feed/rss/
You can add such a rewrite endpoint yourself using the add_rewrite_endpoint() function. The code below shows how I created an alternative view for my posts and pages called “gallery”. It also shows what I need to do to make an extra query variable available with the name of the endpoint. The part after the slash after the endpoint in the URL become the new query variable’s value.
add_rewrite_endpoint('gallery', EP_PERMALINK | EP_PAGES);
$wp_rewrite->flush_rules();

add_filter('query_vars', 'aihato_queryvars');
add_action('template_redirect', 'aihato_special_gallery_template');

function aihato_special_gallery_template() {
  global $wp_query;

  if ( is_category('fotogalerij') or is_category('filmgalerij') ) {
    include(TEMPLATEPATH . '/galleries.php');
    exit;
  }

  if ( isset($wp_query->query_vars['gallery']) ) {
    include(TEMPLATEPATH . '/gallery.php');
    exit;
  }
}

function aihato_queryvars($qvars) {
  $qvars[] = 'gallery';
  return $qvars;
}
The code above creates an alternative “view” of posts that I can use to view all the images attached to that post. When the user inserts the gallery into a post, the following code makes it so that instead of the images, the visitor will see a link to the gallery view of that post.
add_filter('post_gallery', 'aihato_gallery_filter', 2);

/**
 * Modifies the behaviour of the [gallery] shortcode.
 */
function aihato_gallery_filter($null, $attr = array()) {
// Snipped: code to generate a nice link
}
ContentFlow / FancyBox integration
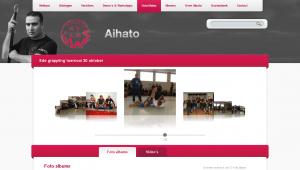
To make the gallery view look cool, I implemented the CoverFlow effect using the ContentFlow jQuery plugin. It’s pretty cool. It supports reflection, scrolling with a scroll wheel and it just feels right™. I hooked it up to FancyBox, a very slick Lightbox clone for jQuery. The result was, I must say, immensely pleasing. 🙂 Both effects support scrolling and the FancyBox effects make it look like the images in the ContentFlow are really blown up and shrunk. (I’ve made it so that the FancyBox appears when you click the active image in the ContentFlow.)
This is some of the spaghetti code that made the two effects play nicely together:
// Returns the offset of the item to start showing
function albumFlowStartItem() {
  var hashNumber = window.location.hash;

  if ( hashNumber && hashNumber.match(/^#\d+$/) ) {
    hashNumber = hashNumber.replace(/^#(\d+)$/, '$1');
    return jQuery('#album_flow a#attachment-'+hashNumber).prevAll().size();
  }

  return 'center';
}

// My own custom state variable
jQuery.fancybox.remainActiveUntilClosed = false;

jQuery(document).ready(function() {
  jQuery('#album_flow a').fancybox({
    transitionIn: 'elastic',
    transitionOut: 'elastic',
    speedIn: 600,
    speedOut: 200,
    overlayShow: false,
    cyclic: true,
    onStart: function(selectedArray, selectedIndex, selectedOpts) {
      element = selectedArray[selectedIndex];

      return jQuery.fancybox.remainActiveUntilClosed || element.hasClassName('active');
    },
    onComplete: function() {
      jQuery.fancybox.remainActiveUntilClosed = true;
    },
    onClosed: function() {
      jQuery.fancybox.remainActiveUntilClosed = false;
    }
  });

  var albumFlow = new ContentFlow('album_flow', {
    reflectionHeight: 0.3,
    flowSpeedFactor: 0.7,
    startItem: albumFlowStartItem(),
    onclickActiveItem: function(item) {
      var itemOffset = jQuery(item.element).prevAll().size();
      jQuery.fancybox.pos(itemOffset);
    },
  });
});
Categories for photo/video galleries
To make a post appear in the photo gallery, you just have to check that category. Making posts appear in the video gallery works the same. These listings are displayed using the galleries.php template thanks to a little bit of code in aihato_special_gallery_template(). I redirected these archive views to that template because otherwise I’d have had to make a symlink to use the same file for the video category and the photo category. (I’d have needed two files: category-fotogalerij.php and category-filmgalerij.php.)
I like how I simply used a custom view of both a post and of two different category archives to achieve all my media gallery requirements. There’s no wild database customizations or heavy plug-ins involved. It’s low-fat and carb-free.
YouTube is king
Because I was too lazy to find a good playback solution and I’m a bit reluctant to self-host video files anyway, I decided to put together something that relies solely on embedding videos hosted elsewhere. To be completely honest, although WordPress is quite flexible in this sense, “elsewhere” means just YouTube here.
The idea is simple: WordPress already allows you to just paste a YouTube URL into the post editor and all the embedding code is created for you. Building on this, to show the latest video on the homepage, I just perform a search for posts which contain a YouTube URL. Then I parse the content a bit, and include the YouTube ID in my own low-res embed code. (The latest video area on the homepage is smaller than the default embed created by WordPress.)
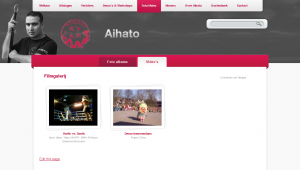
When generating the film gallery overview, my theme goes through all the YouTube URLs in all posts categorized as “Filmgalerij”. For each of these URLs, it uses the YouTube API to retrieve the movie title and the URL of an adequately sized thumbnail. That means that, for thumbnails to appear in the gallery, the associated posts don’t need a featured image, just one or more YouTube URLs. This approach also makes it so that you can embed as much YouTube URLs in each post as you like, since the gallery will cope beautifully.
When a visitor clicks a movie thumbnail, a YouTube embed pops up using FancyBox. Did I mention how cool FancyBox is? Pretty damn cool:
jQuery('a.youtube').click(function(){
  jQuery.fancybox({
    'padding': 0,
    'autoScale': false,
    'transitionIn': 'none',
    'transitionOut': 'none',
    'title': this.title,
    'width': 680,
    'height': 495,
    'href': this.href.replace(new RegExp("watch\\?v=", "i"), 'v/'),
    'type': 'swf',
    'swf': {
      'wmode': 'transparent',
      'allowfullscreen': 'true'
    }
  });

  return false;
});
Menus and navigation
// This is the ultimate in ugly hacks. Enjoy! :-)
function aihato_main_menu_filter($items) {
  global $wp_query;

  // menu-item-639 = Nieuws
  // menu-item-643 = Foto/Video (connected to the fotogalerij category)

  // This conditional makes it the current-menu-item also when we're in the filmgalerij category,
  // and when we're looking at the gallery view of a post (through the gallery rewrite endpoint).
  if ( is_category('filmgalerij') or isset($wp_query->query_vars['gallery']) ) {
    $items = preg_replace('!(menu-item-643)!', '\\1 current-menu-item', $items);
  }
  // This conditional ensures that the Nieuws menu item is active when we don't want to be in the gallery.
  // At the same time, it makes sure that the the Foto/Video menu item is inactive.
  elseif ( !isset($wp_query->query_vars['gallery']) and (is_archive() or is_single()) ) {
    $items = preg_replace('!(menu-item-639)!', '\\1 current-menu-parent', $items);
    $items = preg_replace('!current-menu-parent current-post-parent (menu-item-643)!', '\\1', $items);
  }

  return $items;
}
As soon as WordPress 3.0 was released somewhere during the development of this website, I started to use its new Custom Menu Management feature.
Before the change:
<?php wp_list_pages(array( 'depth' => 1, 'title_li' => '', 'sort_column' => 'menu_order, post_title' )) ?>
After the change:
<?php wp_nav_menu(array( 'menu' => 'main', 'depth' => 1 )) ?>
As you can see, the change wasn’t difficult, but, more importantly, it gave me some useful powers that I could use for good. For the main menu, I could include a category, which I used to add the Fotogalerij category. I could also change the label of that item to be different from the category name so that it also seems to apply to the Filmgalerij category. That, together with the ugly hack above, gave me my illusionary Photo/Video category.
Another place where I could put the custom menus to good use was the Sportschool section. There I had to design a submenu, because designers always forget a few vital pieces in their design, such as how submenus should look. However, the submenu shouldn’t just include links to pages, but also links to two different subscription forms (uploads). The new menu system allows me to do this quite easily.
So, again, I could replace something that didn’t do exactly what I wanted:
<?php wp_list_pages(array( 'title_li' => get_the_title(11), 'child_of' => 11, 'include' => array(11) )); ?>
With something simpler that did:
<?php wp_nav_menu(array( 'menu' => 'school' )) ?>
It is a curious aspect of this website that every section has its own means of navigating within that section.
- The fighter profiles section uses a carousel at the top to select fighters. In the future, some form controls to filter the carousel will also be added.
- The Photo/Video gallery is divided into two subsections (one for photos and one for videos). These subsections are subsequently navigated using a grid view of the individual photo albums or videos. When viewing a photo album, navigation is further refined using the ContentFlow UI.
- The news section is subdivided in yearly archives which are presented as a sort of pagination interface.
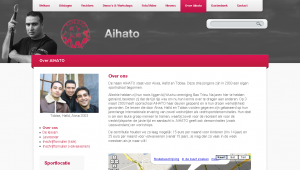
- The Sportschool (“Over Aihato”) section sports a simple “submenu” in the left column. This is in fact a separate menu defined in the theme and managed using the new menu editor.
- Finally, the guestbook uses WordPress’ default comment pagination.
Conclusion
This turned out to be a pretty long post taking a ridiculous amount of time to write. But, hey, this way I have at least documented the project. I don’t think that such detailed documentation would have happened otherwise. In my experience, “in-house” documentation sucks donkey ass. It’s never complete. It’s never up-to-date and – worst of all – it doesn’t invite comments. It’s just not part of big WWW.
I’m glad that the new website is on-line. I love how it turned out (even though I still hate web development). The enthusiastic reception of this project even compensates for some of my previous web development traumas. 😉 I find myself quite enjoying the after-work because of the laid-back attitude of the guys. What’s worse: I’m actually looking forward to implementing some of the planned improvements. That’s strange. Maybe it’s the complete lack of hysterics about the shape of a particular icon (“I want the trash can back!”) or the phrasing of a particular sentence (“How could this have happened?! You should have quadruple-checked this first! Aaarggh! Now our company will die because we look unprofessional!”). Some people are just more fun to work forwith than other people I guess.
It took me forever to find the packages on Archlinux that contained the XML catalogs files for HTML and XHTML. So:
aur/html-docs
aur/xhtml-docs
It installs a file in /etc/profile.d and sets SGML_CATALOG_FILES, so be sure to su – or login again.
My attempts to get Xen working right on Debian stable (Lenny) were not really successful. Xen has had some interesting developments and the version in Lenny is just too old. Plus, the debian bootstrap scripts used to create images don’t support Ubuntu Maverick… Squeeze (testing) has the newest Xen and deboostrap, so that’s cool. I used the AMD64 architecture.
First install Xen:
aptitude -P install xen-hypervisor-4.0-amd64 linux-image-xen-amd64 xen-tools
Debian Sqeeuze uses Grub 2, and the defaults are wrong for Xen. The Xen hypervisor (and not just a Xen-ready kernel!) should be the first entry, so do this:
mv -i /etc/grub.d/10_linux /etc/grub.d/50_linux
Then, disable the OS prober, so that you don’t get entries for each virtual machine you install on a LVM.
"" >> /etc/default/grub "# Disable OS prober to prevent virtual machines on logical volumes from appearing in the boot menu." >> /etc/default/grub "GRUB_DISABLE_OS_PROBER=true" >> /etc/default/grub
update-grub2
Per default (on Debian anyway), Xen tries to save-state the VM’s upon shutdown. I’ve had some problems with that, so I set these params in /etc/default/xendomains to make sure they get shut down normally:
XENDOMAINS_RESTORE=false
XENDOMAINS_SAVE=""
In /etc/xen/xend-config.sxp I enabled the network bridge (change an existing or commented-out line for this). I also set some other useful params (for me):
(network-script network-bridge)
(dom0-min-mem 196)
(dom0-cpus 0)
(vnc-listen '127.0.0.1')
(vncpasswd '')
(Also, don’t forget to disable ballooning and setting a max memory.)
Then I edited /etc/xen-tools/xen-tools.conf. This config contains default values the xen-create-image script will use. Most important are:
# Virtual machine disks are created as logical volumes in volume group universe (LVM storage is much faster than file)
lvm = universe

install-method = debootstrap

size   = 50Gb      # Disk image size.
memory = 512Mb    # Memory size
swap   = 2Gb    # Swap size
fs     = ext3     # use the EXT3 filesystem for the disk image.
dist   = `xt-guess-suite-and-mirror --suite` # Default distribution to install.

gateway    = x.x.x.x
netmask    = 255.255.255.0

# When creating an image, interactively setup root password
passwd = 1

# I think this option was this per default, but it doesn't hurt to mention.
mirror = `xt-guess-suite-and-mirror --mirror`

mirror_maverick = http://nl.archive.ubuntu.com/ubuntu/

# Ext3 had some weird settings per default, like noatime. I don't want that, so I changed it to 'defaults'.
ext3_options     = defaults
ext2_options     = defaults
xfs_options      = defaults
reiserfs_options = defaults
btrfs_options    = defaults

# let xen-create-image use pygrub, so that the grub from the VM is used, which means you no longer need to store kernels outside the VM's. Keeps this very flexible.
pygrub=1

# scsi is specified because when creating maverick for instance, the xvda disk that is used can't be accessed.
# The scsi flag causes names like sda to be used.
# scsi=1 # no longer needed
I created the following script to easily let me make VM’s:
#!/bin/bash

# Script to easily create VM's. Hardy, maverick and Lenny are tested

dist=$1
hostname=$2
ip=$3

if [ -z "$hostname" -o -z "$ip" -o -z "$dist" ]; then
  echo "No dist, hostname or ip specified"
  echo ""
  echo "Usage: $0 dist hostname ip"
  exit 1
fi

if [ "$dist" == "hardy" ]; then
  serial_device="--serial_device xvc0"
fi

xen-create-image $serial_device --hostname $hostname --ip $ip --vcpus 2 --pygrub --dist $dist
At this point, you can reboot (well, you could earlier, but well…).
Usage of the script should be simple. When creating a VM named ‘machinex’, start it and attach console:
xm create -c /etc/xen/machinex.cfg
You can escape the console with ctrl-]. Place a symlink in /etc/xen/auto to start the VM on boot.
As a sidenote: when creating a lenny, the script installs a xen kernel in the VM. When installing maverick, it installs a normal kernel. Normals kernels since version 2.6.32 (I believe) support pv_ops, meaning they can run on hypervisors like Xen’s.
Because the unix permission model sucks, it is very hard to have a shared directory where everybody has full access to each others files. The same is true when making a shared samba archive. Luckily, samba has forcing options.
[archief]
  comment = save stuff here
  path = /path
  guest ok = yes
  writeable = yes
  browseable = yes
  force user = samba
  force group = samba
  create mask = 0660
  force create mode = 0660
  directory mask = 0770
  force directory mode = 0770
The key here is the force modes.
There is this website, dealextreme.nl, which sells all kinds gadgets for low prices. I bought two SD-to-IDE addapters, so that I could put a solid state disk in my router.
The first one I tried caused the computer not to boot, crash, hang, etc. The second one I tried had the missing pin in the IDE connector in the wrong place, so you couldn’t put an IDE cable in:

Other people I know have ordered things like batteries that can only be charged once.
I’m never buying anything from that piece of shit site again.

Recent Comments