Smokes your problems, coughs fresh air.

Tag: CLI (Page 2 of 2)

Tracking MediaWiki in a Subversion vendor branch

Vendor branches are the proper™ way of merging upstream changes in your web application installations. In Subversion, managing vendor branches isn’t so easy as it is in Git. Still, vendor branches make it much easier to track upstream.

From before I first deployed the Omega Research Wiki, I already used svn to track changes to my MediaWiki installation. However, for upgrading from one upstream release to the next, I used diff and patch. This isn’t the most reliable of methods as is exemplified by doing a diff comparing a fresh MediaWiki download with the actual files in my repo (which are supposed to belong to the same version).

What’s basically a shortcoming of svn is that I can’t just say:

svn merge http://svn.wikimedia.org/svnroot/mediawiki/tags/REL1_15_0/phase3/ \
http://svn.wikimedia.org/svnroot/mediawiki/tags/REL1_15_1/phase3/ .

This would have been incredibly helpful, because now I’m keeping a vendor branch not because of local modifications to upstream, but just to be able to merge cleanly.

In Subversion, maintaining a vendor branch by hand is quite some work, because you need to do a checkout first before you can import each version. (My working copy is normally a checkout of /trunk, not of /vendor/mediawiki.) Luckily, Subversion is distributed with a handy Perl script, svn_load_dirs.pl, which can do most of the heavy lifting.

Still, I didn’t feel like having to do to many manual steps, such as typing in the painfully long URLs for merging, so I decided to wrap the whole process into a nice little Bash script:

cat upgrade-mediawiki.sh
#!/bin/bash
 
svn_repo_url=file:///var/svn/wiki.omega-research.org/vendor/mediawiki/
 
merge=1 [ $# -gt 2 ] # Process extra options
    "$1"
        --no-merge)
            merge=0
            ;;
   
   
 [ $# -ne 2 ]; then
    "Usage: $0 [--no-merge] version version"
    1
 
last_version=$1
new_version=$2
 
tmp_dir=`mktemp -d` $tmp_dir
 version $*;
    "Downloading and extracting MediaWiki version $version..."
 
    [ -z `svn ls $svn_repo_url|grep $version` ];
        branch= $version |sed -e 's/\.[0-9]\+$//'`
        download_file="mediawiki-$version.tar.gz"
        download_url="http://download.wikimedia.org/mediawiki/$branch/$download_file"
 
        wget $download_url || { "Downloading $download_file failed">&2; 1; }
        tar --extract --ungzip --transform 's/^mediawiki-//' --file $download_file
        svn_load_dirs.pl $svn_repo_url -t $version current $version
   
 - [ $merge == '1' ];
    svn merge "$svn_repo_url$last_version" "$svn_repo_url$new_version" .
 0

The script only downloads and imports each specified version if that version doesn’t already exist in /vendor/mediawiki/. Also, because it has a --no-merge option, you can download all the old versions of MediaWiki that you’ve ever used, so that you can go back and compare old versions of your installation with the factory version. Of course, this is only useful if you were already tracking your installation in svn at the time, and even then not really. 😉

Anyway, the important thing is that you can use the script to download the version you’re running now and the version you want to upgrade too. I wanted to make a big jump, from 1.11.1 to 1.15.0 (I had put of the upgrade for a long time, because I first wanted to learn more about vendor branches):

Of course, as always, you need to check if the patch went well. My own results were a vivid demonstration of the unreliability of my previous method:

svn st|grep '^C'
C      languages/messages/MessagesKrj.php
C      languages/messages/MessagesWar.php
C      languages/messages/MessagesSe.php
C      languages/messages/MessagesFrc.php

Luckily, these were all files I was sure I hadn’t modified:

i `svn st|grep '^C'|sed -e 's/^C //'`; mv $i.merge-right.r32 $i; svn resolved $i;
Resolved conflicted state of 'languages/messages/MessagesKrj.php'
Resolved conflicted state of 'languages/messages/MessagesWar.php'
Resolved conflicted state of 'languages/messages/MessagesSe.php'
Resolved conflicted state of 'languages/messages/MessagesFrc.php'

Apparently, a previous upgrade hadn’t turned my MediaWiki installation exactly into 1.11.1.

winepath

I have all these little scripts in my $HOME/bin directory to ease the execution of Windows programs. For instance, I don’t like to type the full path to Excel Viewer every time when I need to view an Excel sheet in Linux:

#!/bin/sh
"/home/bigsmoke/.wine/drive_c/Program Files/Microsoft Office/OFFICE11/XLVIEW.EXE" "$*"

This works pretty well, except when trying to view a document that’s not in the current directory:

xlview "/tmp/Some Excel sheet sent to me by someone.xls"

To make that work, you need to use a handy utility that comes with Wine, winepath. With winepath, I can modify the script to work (the example is for wordview):

#!/bin/bash
path=`winepath --windows "$*"`
"/home/bigsmoke/.wine/drive_c/Program Files/Microsoft Office/OFFICE11/WORDVIEW.EXE" "$path"

This, together with Linux’s binfmt_misc makes executing Windows programs on Linux a breeze.

Extracting the MP3 stream from a Flash Video (flv) file

I wanted to convert an Flash Video (flv) file from YouTube to MP3. The first tip I found essentially streamed the original file into a different file:

ffmpeg -i filename.flv -acodec mp3 -ac 2 -ab 128 -vn -y filename.mp3

This is a bit awkward, because not all flv files have the same quality (some are mono, for example). I don’t want to have to look up the number of channels (-ac 2 in the example) for each file that I need to convert.

Luckily, most flv files include an MP3 audio stream and ffmpeg can simply copy that stream to a new file:

ffmpeg -i filename.flv -acodec copy filename.mp3

This works perfectly and is much faster than the other method.

My quest for the ultimate Bash prompt

On my new laptop (a Lenovo T61) I was still using the default Gentoo prompt in Bash. This was kind of a shame since my last Gentoo installation (on what is now my sister’s Ubuntu machine) had a beautifully customized prompt. It was time to dig up the old escape codes.

The old

To recover my old prompt I didn’t even need to go rummaging through old files. All I had to do was to find an old forum post on the Gentoo forums. But, I noticed immediately that I didn’t like this old prompt so much anymore. It had too much stuff and it didn’t have very strong root warning signals.

My old Bash prompt

My old Bash prompt

My old Bash prompt as root

My old Bash prompt as root

The new

My new Bash prompt

My new Bash prompt

For my new prompt I used the PROMPT_COMMAND environment variable. The command in this environment variable is always run before the prompt is displayed. This means that, if you set the PS1 environment variable from this command, you can change your prompt depending on circumstances.

I pushed the dollar (or hash)-sign all the way to the left because I often type in very long commands. A little more space is used if there are background jobs, but only if there are background jobs.

My new Bash prompt with background jobs

My new Bash prompt with background jobs

You should never be root for too long, so I made being root very noticeable (and even slightly annoying):

My new Bash prompt as root (and with background jobs)

My new Bash prompt as root (and with background jobs)

The following is the code I use to create the prompt. Stick it wherever you want it (e.g. in your user’s bashrc or in the system-wide bashrc) and adjust it to look nice and play nice with the rest of your environment. The code isn’t pretty, but it does what it has to. 😉

prompt_command {
  XTERM_TITLE="\e]2;\u@\H:\w\a"
 
  BGJOBS_COLOR="\[\e[1;30m\]"
  BGJOBS=""
  [ "$(jobs | head -c1)" ]; BGJOBS=" $BGJOBS_COLOR(bg:\j)";
 
  DOLLAR_COLOR="\[\e[1;32m\]"
  [[ ${EUID} == 0 ]] ; DOLLAR_COLOR="\[\e[1;31m\]";
  DOLLAR="$DOLLAR_COLOR\\\$"
 
  USER_COLOR="\[\e[1;32m\]"
  [[ ${EUID} == 0 ]]; USER_COLOR="\[\e[41;1;32m\]";
 
  PS1="$XTERM_TITLE$USER_COLOR\u\[\e[1;32m\]@\H:\[\e[m\] \[\e[1;34m\]\w\[\e[m\]\n\
$DOLLAR$BGJOBS \[\e[m\]"
} PROMPT_COMMAND=prompt_command

More info

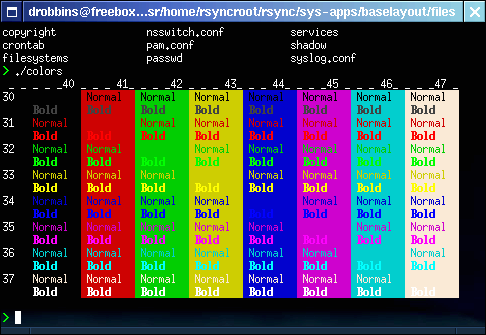
If you want to learn more about customizing your prompt, there’s an article up at IBM’s website. From it, I stole this nice color table:

Console color codes table

Console color codes table

Another tip: you can type man console_codes for everything about … console codes.

GNU Screen window captions as XTerm tabs

XTerm is my favorite terminal emulator and I love GNU Screen. So, imagine my joy when I found out that Screen can persistently show window captions ([Ctrl+A]: caption always).

GNU Sreen with default window captions (in XTerm)

Now I wouldn’t loose track of my windows so easily. No more detours through the Window-list, and it gets better; from the Screen manual, I learned that I could set the caption to a string. Look what [Ctrl+A]: caption '%w' does:

GNU Screen with simple window captions (in XTerm)

Cool! I could finally have my XTerm tabs. 🙂 Just recently, I was telling Wiebe—in reply to a complaint of him about getting lost in Screen’s window list—how cool it would be if you could have a terminal emulator display a tab for each screen window. Now I can tell him, instead, that tabs in a terminal emulator are a superfluous feature.

My current configuration

GNU Screen with window captions (in XTerm)

This last example is done with the following Screen command: caption always "%{= kB}%-Lw%{=s kB}%50>%n%f* %t %{-}%+Lw%<" There are more examples in the manual page. Enjoy your tabs!

XTerm is favorite

XTerm is know to most X-Windows users as that ugly terminal with the strange scrollbar and the unreadable font. And it doesn’t even have tabs! But, I think it’s the best damn terminal emulator in the world. It just doesn’t appear that way at first.

By default, XTerm comes with warts:

  • It has an ugly, small font.
  • What’s up with the black on white? I’m a 1337 h4x0r and I want a black background, damnit!
  • Double-click Selections is unintuitive.
  • Where are the tabs?

Default configuration for XTerm 234

But its warts are easily removed.

The font is small and ugly

Easily solved:

$ xrdb -merge
/* I want pretier fonts */
XTerm*faceName: Liberation Mono
XTerm*faceSize: 10
[Ctrl+D]
$ xterm

XTerm with nicer than default font

The black on white is an insult to my 1337ness

No longer so:

$ xrdb -merge
/* I want a 1337-style color-scheme */
XTerm*background: black
XTerm*Foreground: Grey
[Ctrl+D]
$ xterm

Now I can install my 1337 hacking tools in style! (If only I could install 1337 hacking skills as easily.)

1337-style XTerm

Double-click selections are unintuitive

Most terminal emulators let you double-click to quickly select words. XTerm does this as well, but its definition of a “word” is a bit narrow if you’re used to other programs. The good news is that XTerm is extremely configurable in this sense. It lets you decide what to select on double-click, on triple-click, all the way up to 5 clicks. You can define the boundaries of the selection by means of presets such as line, group and page, but what I like best is its ability to use regular expressions. This lets you do cool things, like, for example, using one click to select a word, two clicks to select a sentence, and three clicks to select a paragraph.

My own configuration is a bit simple, probably a testimony to how little code I write these days:

$ xrdb -merge
/* The selection only stops at spaces and newlines */
XTerm*on2Clicks: regex [^  \n]+
[Ctrl+D]

Where are my tabs

You should really be using GNU Screen instead, which has too many advantages to name here. It even allows you to do Remote pair programming over SSH.

If you use Screen within an XTerm, be sure to add to following to your X configuration.

$ echo "XTerm*metaSendsEscape: true" | xrdb -merge

Otherwise, you might find yourself unable to control Screen

Saving your configuration

Ready to save your precious configuration?

$ xrdb -edit .Xdefaults

You’re done. It’s time to go brag to your friends.

png2ico: converting favicons to Windows’ ICO format

Even though, strictly speaking, I should be using favicons in anything but Windows’ ICO format and refer to them from a <link>-tag at any location other than /favicon.ico, I sometimes like to help Microsoft break the web by putting an ICO file at the location that they reserved for it (/favicon.ico).

My tool of choice for converting PNG’s to ICO is Matthias Benkmann’s png2ico. To generate an ICO file with this program, you just need to feed it one or more PNG files. The possibility to include differently sized PNG files can help you make sure that the icon will steal look good when being dragged to the desktop or some other non-miniature context.

$ png2ico
png2ico 2002-12-08  (c) Matthias S. Benkmann
USAGE: png2ico icofile [--colors ] pngfile1 [pngfile2 ...]

Here’s an actual example which creates an ICO file from a single PNG file:

$ file favicon.png 
favicon.png: PNG image data, 16 x 16, 8-bit/color RGBA, non-interlaced
$ png2ico favicon.ico favicon.png 

Of course, we should discourage browsers from doing useless requests for /favicon.ico by actually telling them when it is available: (as if…)

<link type="image/x-icon" rel="shortcut icon" href="/favicon.ico" />

Now we can go back to pretending that: No, we’re not encouraging the practice of link squatting. We just happen to have put our favicon in that location.

For the less tech savvy

Update 30 sep 2012: There’s a free online service to convert PNG to ICO: www.pngtoico.com. It doesn’t require you to do anything complicated (like installing Unix stuff). Just pick your original and get the converted image. 🙂

Using wget to download all files on a page

Just a quick one-liner I used to download a bunch of MIDI files from an on-line listing of Chopin MIDIs:

$ wget http://www.piano-midi.de/chopin.htm -q -O - \
| grep 'href=".*\.mid"' \
| sed -e 's/^.*href="\(.*\)".*$/\1/' \
| xargs -i{} wget http://www.piano-midi.de/{}

Maybe not so useful to you, but it’s a good demonstration of applying the hacker’s mentality to one of those moments where, after clicking the fourth link or so, I find myself thinking: Wouldn’t spending a few moments on a one-liner be much more fun than clicking through and saving 44 more links?

Useful or not, I am now testing timidity’s piano sound with a nice rendition of Chopin in the background whereas, without this trick, I’d still be right-click-click-saving links instead of writing this post. It’s up to you to decide whether this is actually good or bad. 😛

Using diff and patch to upgrade web application installations

Update (July 30, 2008): I added information about making sure that the patch was successful.

When you install a big-ass web application such as WordPress or MediaWiki, you usually end with a bunch of configuration files and customizations (skins/themes, extension/plugins, uploads, etc.). This makes upgrading the files that come with the application a bit tricky. There’s a simple solution, however, which work regardless of whether you use a revision control system or not.

First of all, you do, of course, always need a revision control system. I personally recommend Git or Subversion, which are both excellent tools. But, that’s not what this post is about. I’m going to use two simple tools which are uniformly available on all (Unixy) platforms: diff and patch.

The procedure is simple:

  1. Download the version of the application which you’re currently running. For our example, we pretend that this version is extracted into the directory webapp-1.4.3.

  2. Then, download the version to which you’d like to upgrade. (We’re assuming that this version is extracted into the webapp-1.6.2 directory.)

  3. Compare the two versions to create a patch file:

    $ diff --unified --recursive --new-file webapp-1.4.3 webapp-1.6.2 > webapp-upgrade.diff
    
  4. Apply the patch to the installation of said web app:

    $ cd webapp-installed
    $ patch --strip=1 --remove-empty-files < ../webapp-upgrade.diff || echo "Some failures!"
    

Check if everything was patched perfectly

Now, if the patch command returned a non-zero status (printing Some failures! in the above example), it's time to check which chunks of which files failed. Get a summary by searching all files with an .rej or a .orig suffix:

$ find . -name "*.rej"

After manually applying any failed hunks, what's left is to compare your directory containing the patched application to the directory with the contents of the new application archive which you've used to create the patch:

$ cd ..
$ diff --unified --recursive --new-file webapp-1.6.2 webapp-installed

Version management

Your upgrade is done. Now, if your using a revision control system, you just need to check in new files and check out deleted files. In Subversion, I do this quickly using the following command sequence:

$ svn status|sed -e '/^\?/!d; s/^\?//'|xargs svn add
$ svn status|sed -e '/^\!/!d; s/^\!//'|xargs svn del

If you'd been using Git, you could do this all a little bit more sophisticatedly, but my Git skills are not advanced enough to go around giving others advice. Also, it's nice to learn a generic method before learning more specific tools.

Newer posts »

© 2024 BigSmoke

Theme by Anders NorenUp ↑